Visual Studio 2019如何使用Python if语句-使用Python if语句的方法
时间:2022-02-10来源:华军软件教程作者:小葫芦
小伙伴们知道Visual Studio 2019如何使用Python if语句吗?今天小编就来讲解Visual Studio 2019使用Python
if语句的方法,感兴趣的快跟小编一起来看看吧,希望能够帮助到大家呢。
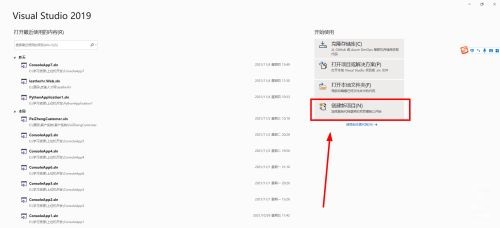
第一步:双击打开Visual Studio 2019(如图所示)。

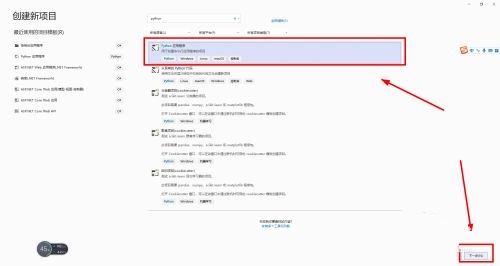
第二步:创建新项目(如图所示)。
第三步:创建Python应用程序(如图所示)。
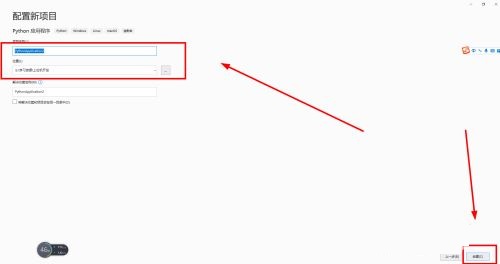
第四步:配置新项目,可以修改项目名称和位置(如图所示)。
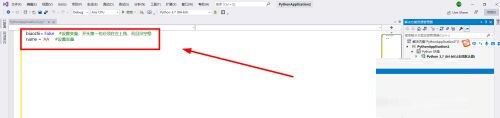
第五步:设置变量,开头第一句必须在左上角,而且没空格
biaozhi= False #设置变量,开头第一句必须在左上角,而且没空格
name = 'AA' #设置变量(如图所示)。
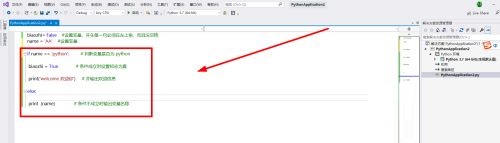
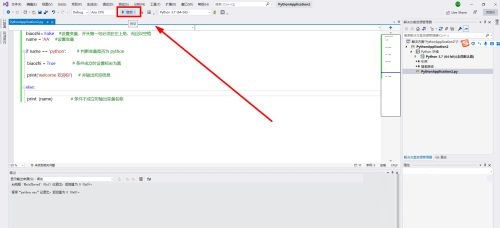
第六步:写if条件语句判断,python注释用#(如图所示)。
第七步:点击“启动”按钮(如图所示)。
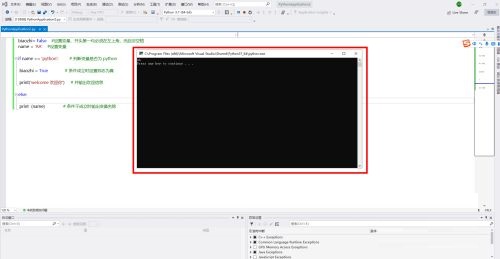
第八步:最后运行,预览程序(如图所示)。
以上就是小编给大家带来的Visual Studio 2019如何使用Python if语句的全部内容,希望能够帮助到大家哦。
热门推荐
-
猿编程
版本: 5.25.1大小:165 MB
猿编程官方版是一款界面美观、功能实用、操作便捷的少儿编程学习工具,面向7至12岁青少年提供在线编程...
-
Python
版本: 3.14.6大小:27.5MB
Python是一款简洁高效的高级编程语言,以清晰易懂的语法著称,无需复杂类型声明,上手门槛低。它支持面向对象...
-
Python
版本: 3.14.6大小:27.5MB
Python官方版是一款相当出色的通用型编程语言,它是一种通用编程语言,广泛应用于Web开发、数据分析、人工智...
-
python
版本: 3.14.6大小:10.35 MB
python官方版是一款编程软件。python最新版会促进了语法信息,数据库服务,信息改进以及综合目标调整上的全程...
-
Python
版本: 3.14.6大小:27.5MB
Python是一款简洁高效的解释型高级编程语言,以清晰语法和动态类型著称,支持面向对象、函数式等多种编程范...