现在有的新手伙伴使用Premiere表示还不了解调整视频对比度的操作,而今天小编分享的就是Premiere调整视频对比度的详细操作流程,各位小伙伴来和小编一起学习下吧。
先点击创建项目,如图所示。

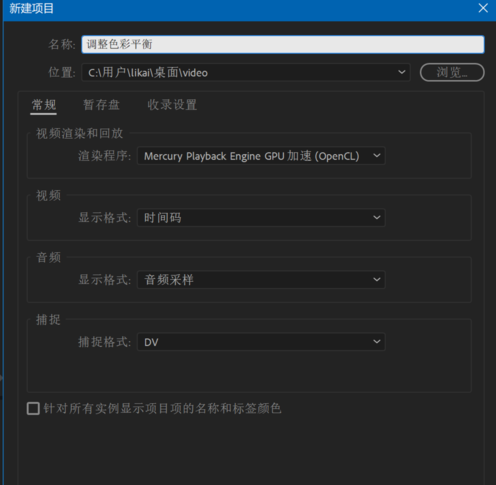
填写好项目名称,点击确定。
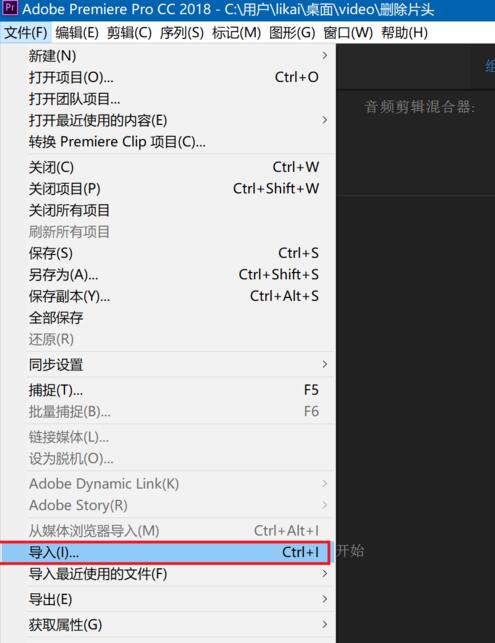
点击文件,导入命令,导入素材。
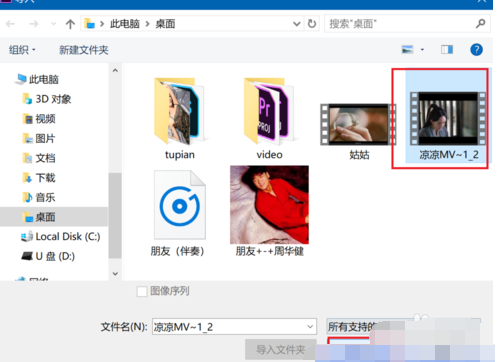
选择要编辑的视频文件,点击打开。
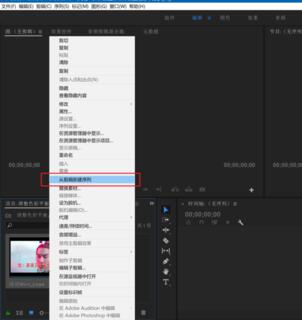
右键单击新添加的视频素材,在弹出菜单中选择从剪辑新建序列。
接着选中视频轨道,并点击上方的颜色,点击右侧的基本校正。
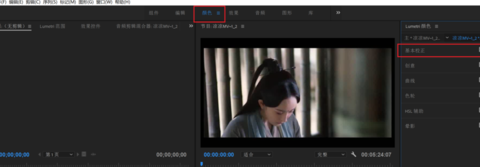
在基本校正的色彩下方有一项对比度,请拖动鼠标进行调节就行。

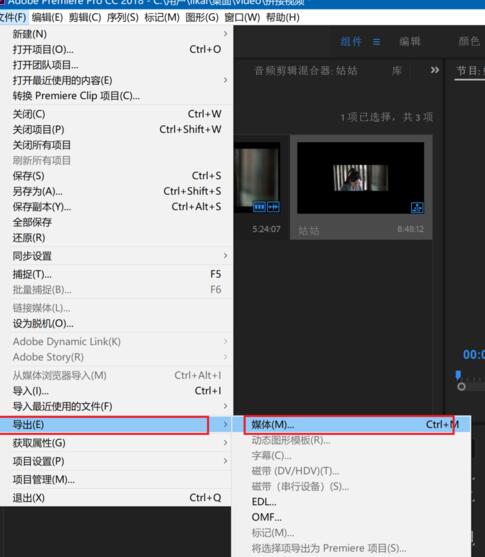
调节完成后,点击文件,导出,媒体命令。
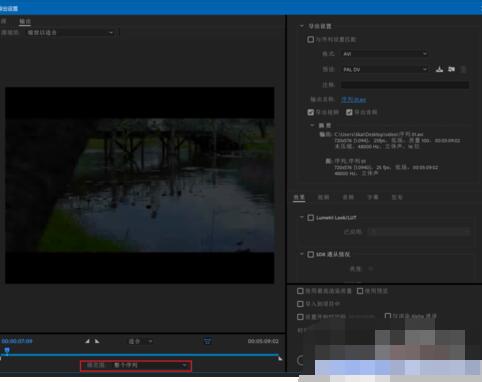
按下图指示进行文件导出,就可以得到新的视频文件。
还不了解Premiere调整视频对比度的详细操作流程的朋友们,不要错过小编带来的这篇文章哦。