近日有一些小伙伴咨询小编Adobe premiere pro CC2019怎么添加波纹效果字幕?下面就为大家带来了Adobe premiere pro CC2019添加波纹效果字幕的方法,有需要的小伙伴可以来了解了解哦。
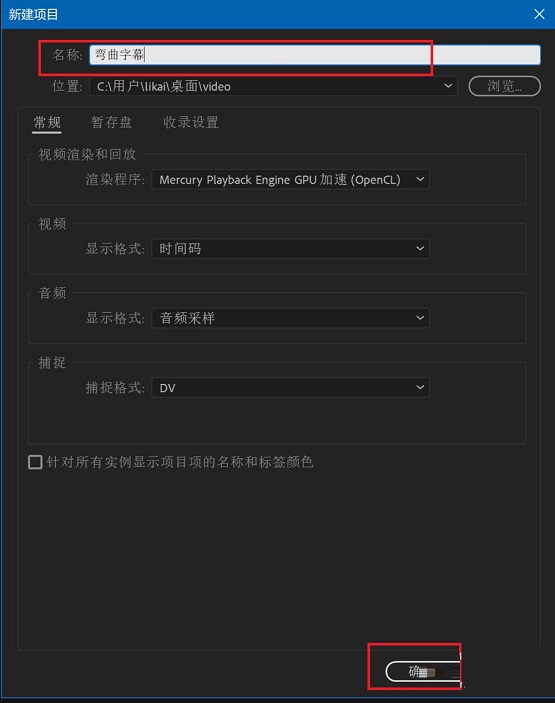
第一步:首先新建一个项目,并进行命名(如图所示)。
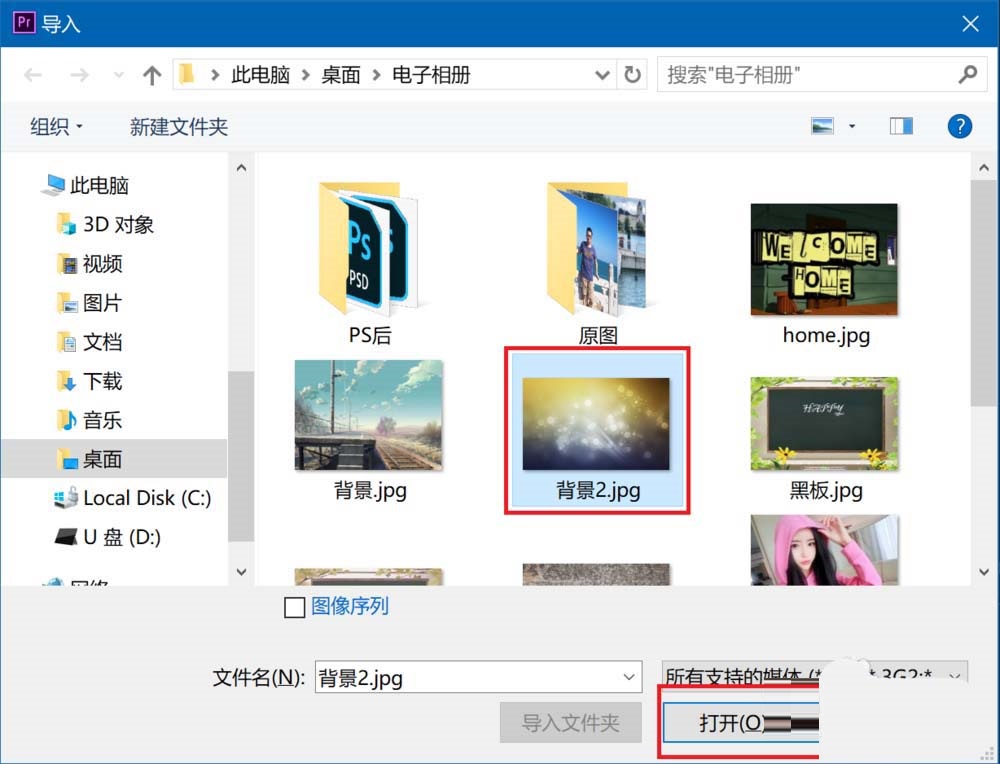
第二步:按快捷键Ctrl+I,打开素材导入对话框,选择需要导入的背景素材后点击打开(如图所示)。
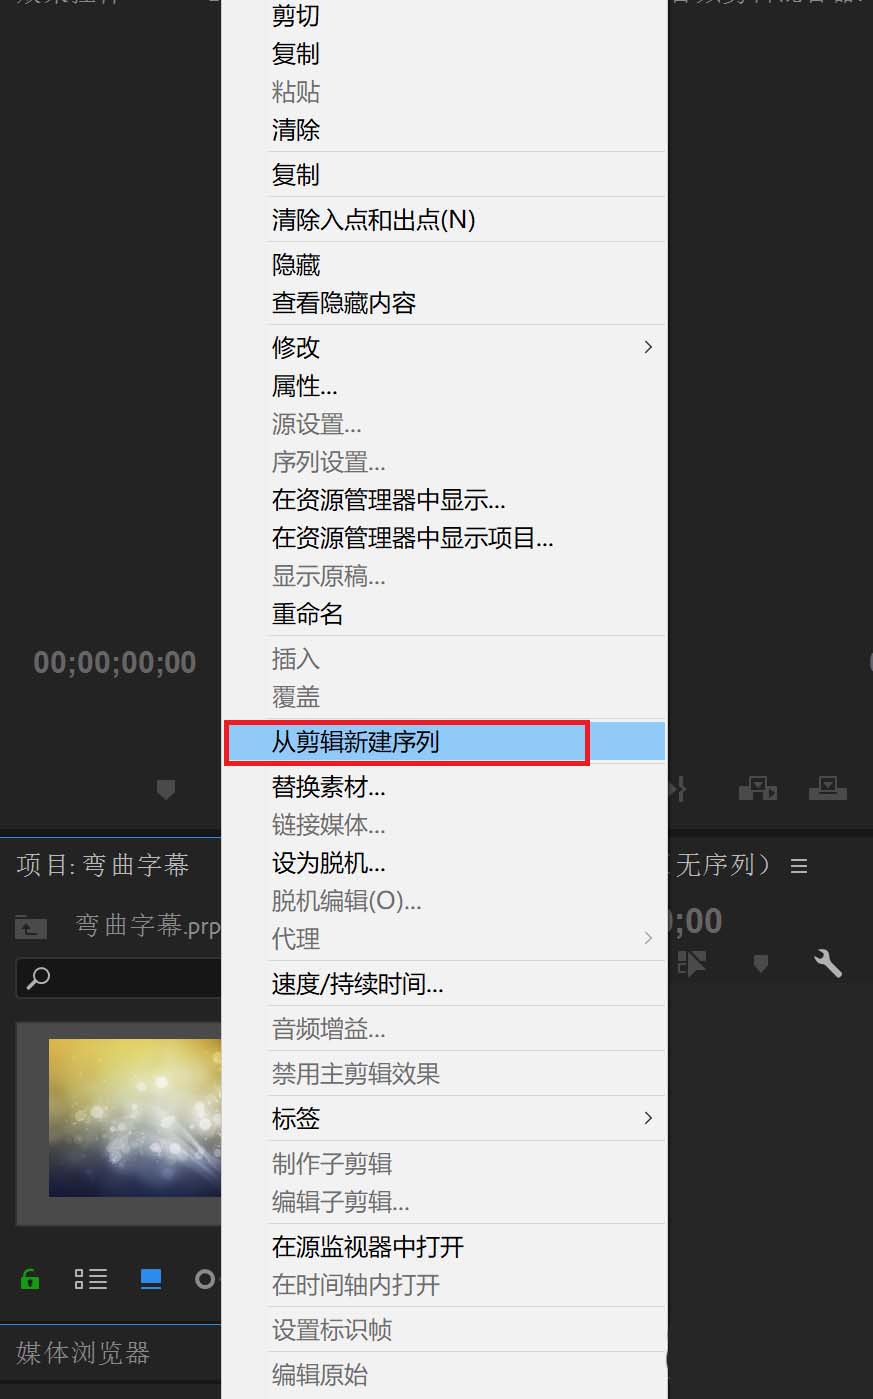
第三步:在导入的素材上右键单击,选择从剪辑新建序列(如图所示)。
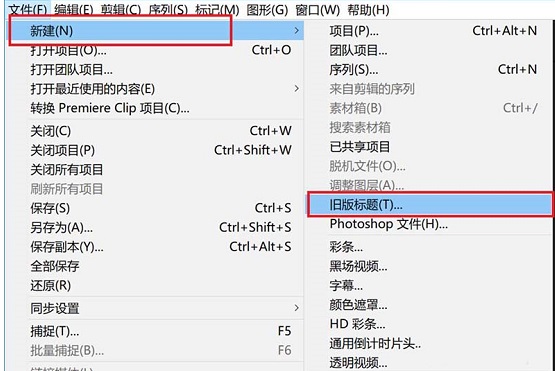
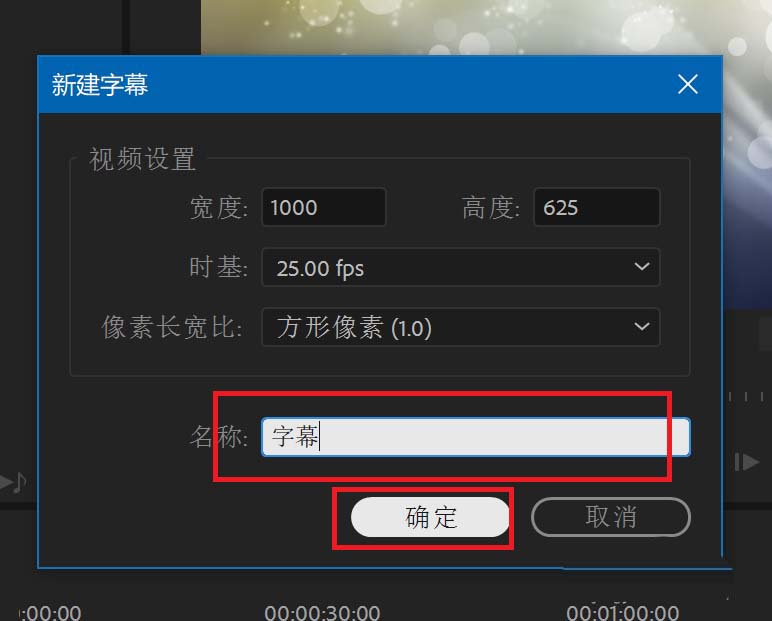
第四步:点击文件,新建,选择旧版标题,然后输入字幕名称后点击确定(如图所示)。
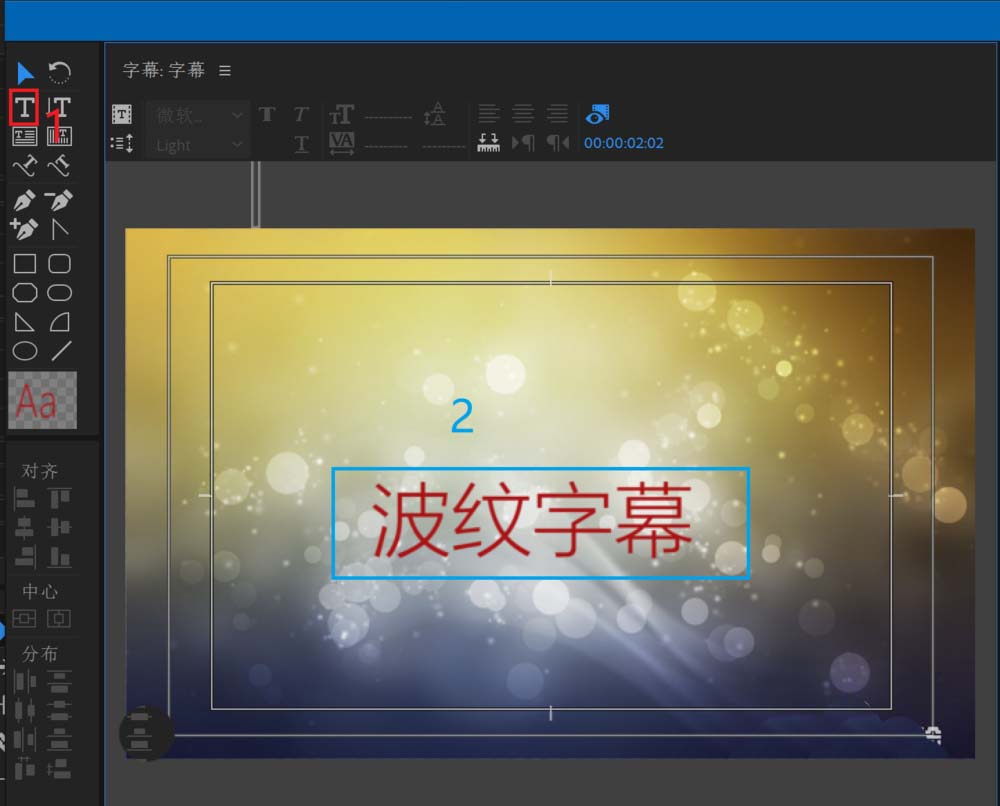
第五步:使用文字工具,在适当的位置进行文字输入(如图所示)。
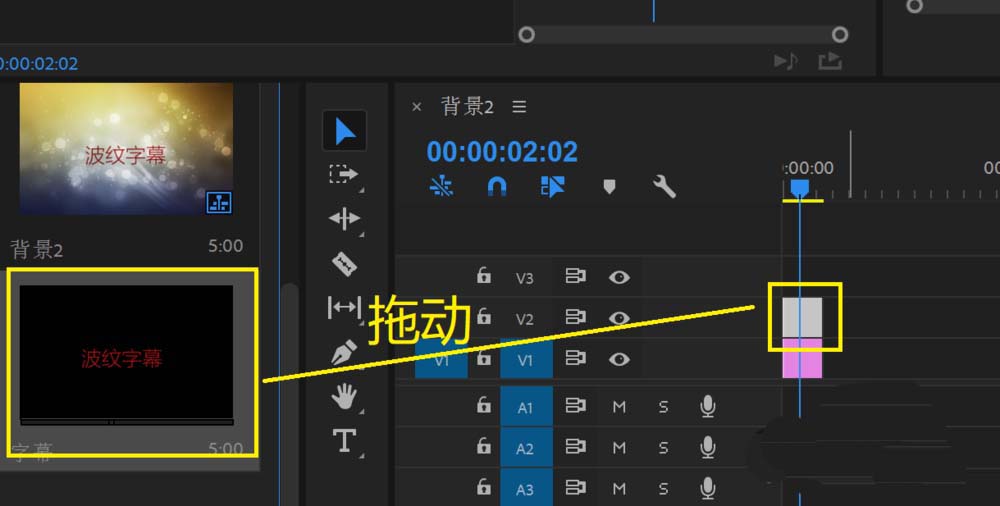
第六步:关闭字幕编辑窗口,然后在素材管理窗口中找到新建的字幕拖动到时间轴的视频轨道2中(如图所示)。
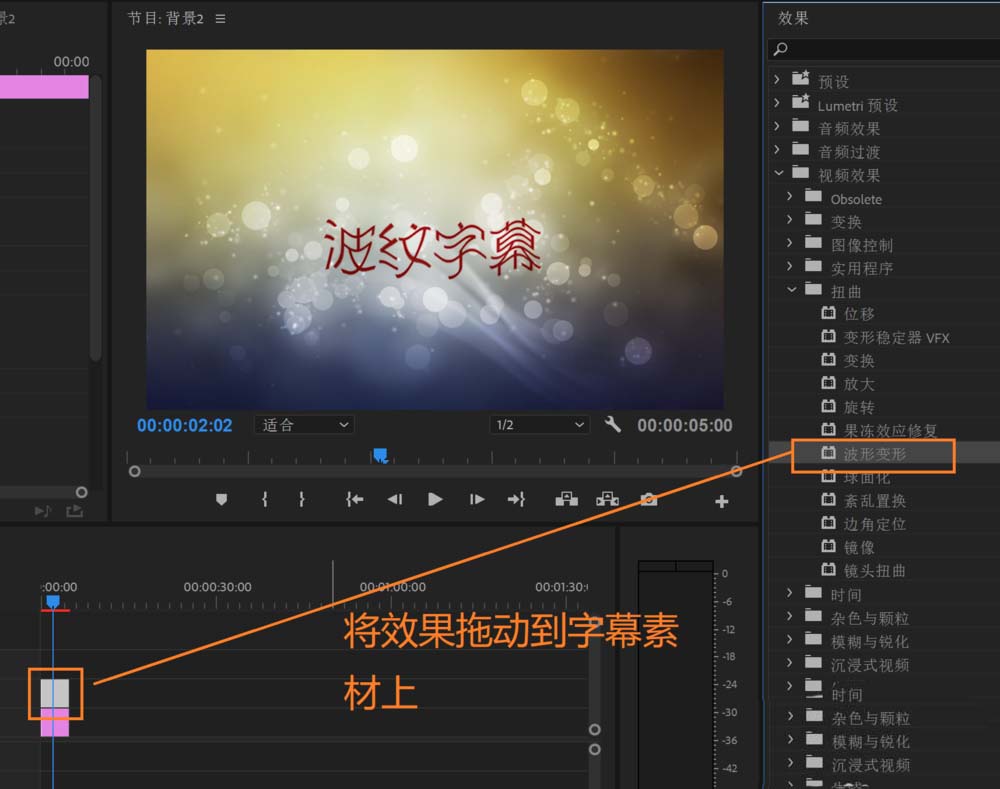
第七步:在视频效果中,找到扭曲,波纹变形,然后拖动到字幕素材上(如图所示)。
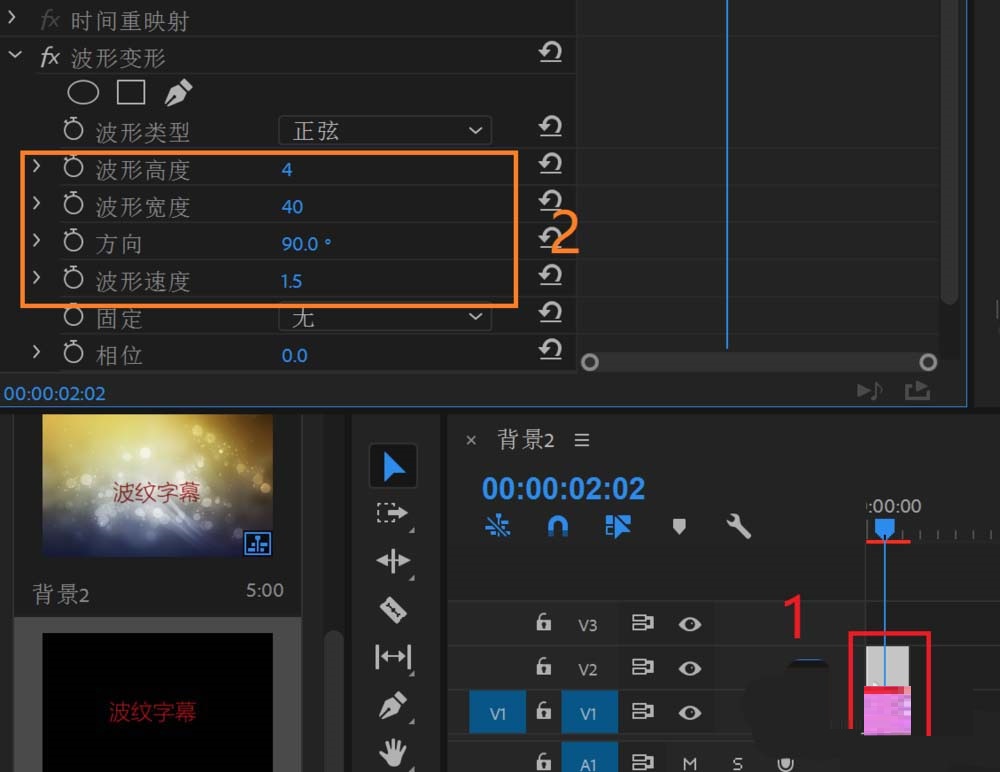
第八步:选中字幕素材,然后在图中红框内更改相应参数即可(如图所示)。
以上就是小编给大家带来的Adobe premiere pro CC2019怎么添加波纹效果字幕的全部内容,希望能够帮助到大家哦。


